Lazy daisy stitch tutorial
To learn how to do lazy daisy stitch, why not check out my lazy daisy stitch tutorial. It includes:
- illustrated embroidery stitch instructions
- a lazy daisy stitch video
- tips for success
- lazy daisy stitch variations, including open lazy daisy stitch
- Royal School of Needlework stitch bank.
Lazy daisy stitch is similar to chain stitch, so it's also called detached chain stitch. The difference is that each stitch is separate from the others. You will use it most often to create petals and flower shapes. You can see lazy daisy stitch here - it's the mid-blue loops in the second oval in from the outer edge.

Download my free stitch guide covering 10 simple embroidery stitches, including lazy daisy stitch.
Lazy daisy stitch tutorial

- Bring the needle up at 1 and then push it back through close to 1.
- Pull the thread up at 2, with the thread behind the needle to form a loop. Pull the thread to make an oval shape.
- Sew a small stitch over the top of the loop, pushing the needle through at 3.
Lazy daisy stitch video
Tips for lazy daisy stitch
- Don't pull your stitches too tight if you want an oval shape. The tighter you pull the thread, the narrower the stitches will be.
Lazy daisy stitch variations
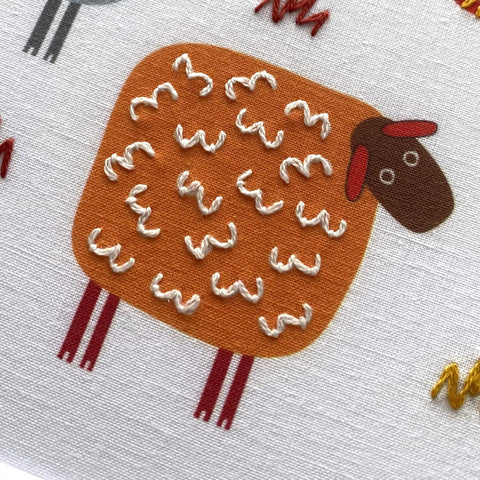
However, if you want a long, thin stitch just pull your thread tighter than you normally would. You can create the shaggy effect on one of the sheep in my sheep embroidery kit using lazy daisy stitch this way:

You may also come across open lazy daisy stitch. The loops are stitched down, but they're left open to form a U shape rather than an oval. Here's an example on one of the other sheep in my sheep embroidery kit:


On standard lazy daisy stitch you can also make a long stitch to hold down the loop. So this variation is ideal for flowers where a stem with a petal or an ear is needed.
More on lazy daisy stitch
